|
SVN(Windows环境下最常用的): svn(subversion)是近年来崛起的版本管理工具,是cvs的接班人。目前,绝大多数开源软件 都使用svn作为代码版本管理软件。 Git: Git 是用于 Linux 内核开发的版本控制工具。与常用的版本控制工具 CVS, Subversion 等不同,它采用了分布式版本库的方式,不必服务器端软件支持,使源代码的发布和交流极其方便。 Git 的速度很快,这对于诸如 Linux kernel 这样的大项目来说自然很重要。 Git 最为出色的是它的合并跟踪(merge tracing)能力。 而Google Android的项目是基于Git进行版本管理的,所以经常在Linux环境下开发的人,就不用我多说了,而大都数在Windows环境开发的人,就比较陌生了。那下面我就手把手教你如何在Windows环境下Git Android源码。 第一步:Msysgit工具的下载(这个是Google为Windows环境下开发的Git客户端程序): http://code.google.com/p/msysgit/ 下载地址如图: 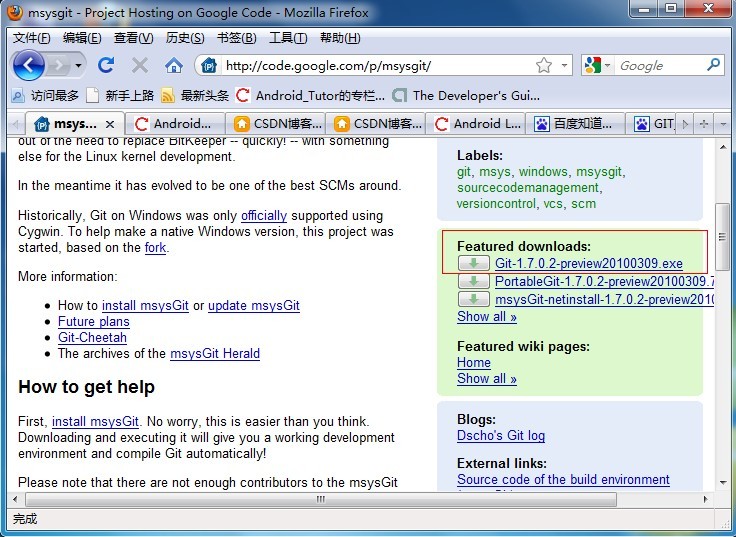
第二步:安装Msysgit软件(一直默认到底),如下图: 
第三步:建立一个文件夹用来存放Git下来的Android 源码(我这里以G:/Android Src)为例,如下图: 
第四步:右击Android Src文件夹选择Git Bash出现如下图所示: 
第五步:查找我们要下载源代码的地址。Android的源代码是放在下面地址下: http://android.git.kernel.org/ 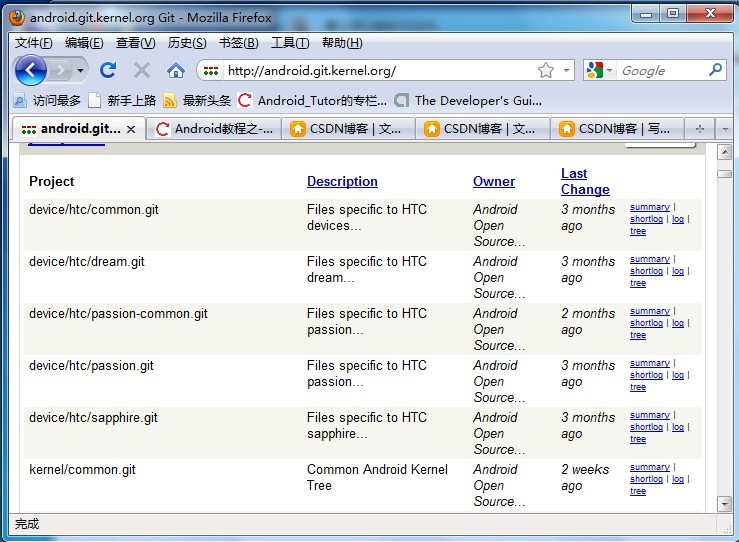
这里以Launcher为例,我们Ctrl + F查找:输入Launcher如下图所示: 
点击链接进入另一个页面: 
第六步在Git Bash端输入如下命令,命令格式(如上图图示) git clone git://android.git.kernel.org/platform/packages/apps/Launcher.git 
在Receiving Objects: 100%时候,我们在G:/Android Src/文件夹下多一个工程Launcher,这正是我们所要的,如下图所示: 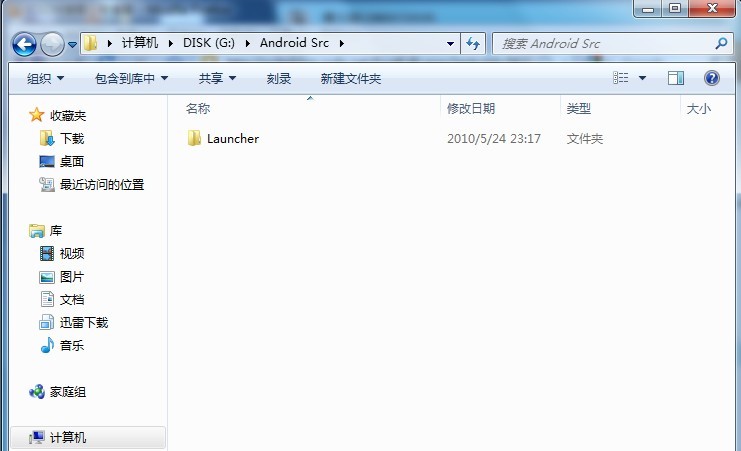
| 


 发表于 2015-4-4 16:40:45

 收藏
收藏 分享
分享 支持
支持 反对
反对